This post is meant to be a brief introduction to some productivity tools that can make a command line workflow smoother and more efficient. While well known, standard tools with similar function already exist (e.g. bash, grep, find, etc.), the tools presented hereafter have a handy user interface with sensible default behaviour, simpler options that are easy to remember, and are optimised for speed, making them useful tools for interactive usage, especially when working on large projects.
It must be noted that such tools are not standardised, and hence less portable than their POSIX counterparts (grep, find, etc.), so they should never replace standard command line utilities in the context of shell scripting.
What follows is only a collection of suggestions for a general purpose workflow, and it is not supposed to be an exhaustive list, moreover the tools mentioned here are not silver bullets, but only a few among many other valuable alternatives available in their respective categories.
Fzf
Fzf is a fuzzy search tool for the command line. Fuzzy matching allows to search for strings that correspond to a given pattern only approximately; with fzf, a string will match a pattern as long as it contains all the characters from the pattern, in the given order. This allows to find things very quickly, with a limited number of keystrokes (if you are not familiar with this search approach, it will become straightforward after a minimal amount of practice, and then you will never look back…). Fzf is optimised for speed and it works well even when dealing with very large text corpora.
Fzf can be used to search for files, file content, processes, variables, and more. Default shell key bindings (for bash, Zsh, and fish) are available to search for files and folders (ctrl + t), commands from the history (ctrl + r), and fuzzy change directory (alt + c). Integrations with the major text editors exist, and fzf can be easily used as a base for custom tools (many examples from the community are available).
Key bindings can be enabled by sourcing the provided install scripts, e.g. for
Zsh source in .zshrc as follows:
# The exact path may depend on your installation
. /usr/share/fzf/key-bindings.zsh
. /usr/share/fzf/completion.zsh
Ripgrep
Ripgrep (rg) is a line search tool
that recursively searches for regex patterns within files, with a behaviour
similar to grep -r. It has a simple and convenient syntax, and by default it
respects .gitignore, ignores hidden files, and offers coloured output. It
supports Perl regular expressions (PCRE2), non-UTF-8 text encodings, search
inside compressed archives, and input preprocessing filters. It is optimised
for speed and it can be significantly
faster than GNU grep when searching
through large text corpora.
A large amount of introduction material can be found in the readme, user guide, and FAQ pages.
It must be noted that ripgrep is not the only alternative to GNU grep, and a number of well-known grep-like tools exist, such as git grep, ack, ucg, sift, ag, and pt. A helpful summary can be found in a comparison table compiled by Andy Lester, main author of ack.
GNU Parallel
GNU Parallel is a tool to run
multiple jobs in parallel. It can take commands to be run either from arguments
or from the standard input, with a syntax similar to xargs. The simplest use
case is to provide a list of commands in input, and Parallel will take care of
distributing them between different processes:
cat list_of_jobs | parallel
If the number of jobs exceeds the number of available workers (by default equal
to the number of CPUs), Parallel will organise a queue. Among the basic
options, it is possible to specify the desired number of workers with the
--jobs argument, and it is even possible to distribute jobs across different
machines via ssh, using the --sshlogin flag.
Parallel does not just allow to run commands, but also to build them, taking
one or multiple lists of arguments and allowing to combine them. A list of
arguments is always introduced by the separator :::. For instance, the
following is a trivial example that outputs all possible binary numbers of
three digits, by feeding all possible combinations of 0 and 1 as arguments
to echo:
$ parallel echo ::: 0 1 ::: 0 1 ::: 0 1
0 0 0
0 0 1
0 1 0
0 1 1
1 0 0
1 0 1
1 1 0
1 1 1
Parallel is a powerful and feature-rich tool, that goes well beyond the scope of this post. The official tutorial is a good starting point to get familiar with its functionalities.
Fd
Fd is a file search tool, with a use case
similar to find. Compared to the latter, it offers a very handy syntax: a
simple search by file name inside the current folder can be done by just
writing fd foo, whereas a minimal find command would look like find . -name
foo.
Fd has sensible defaults oriented towards interactive use (smart-case, coloured
output, respects .gitignore, ignores hidden files and directories), it offers
Unicode support, and optimisation for speed (especially when performing
regex-based search, it can be significantly faster than find).
It has built-in support for parallel execution, with a syntax similar to GNU Parallel. For instance, the following command finds all JPEG images and converts them to PNG in parallel
fd -e jpg -x convert {} {.}.png
and it is equivalent to
find . -name '*.jpg' | parallel convert {} {.}.png
Fd can be used in combination with other tools, for instance as default input source for fzf by setting the following environment variable:
export FZF_DEFAULT_COMMAND='fd --type f'
Command auto-correction
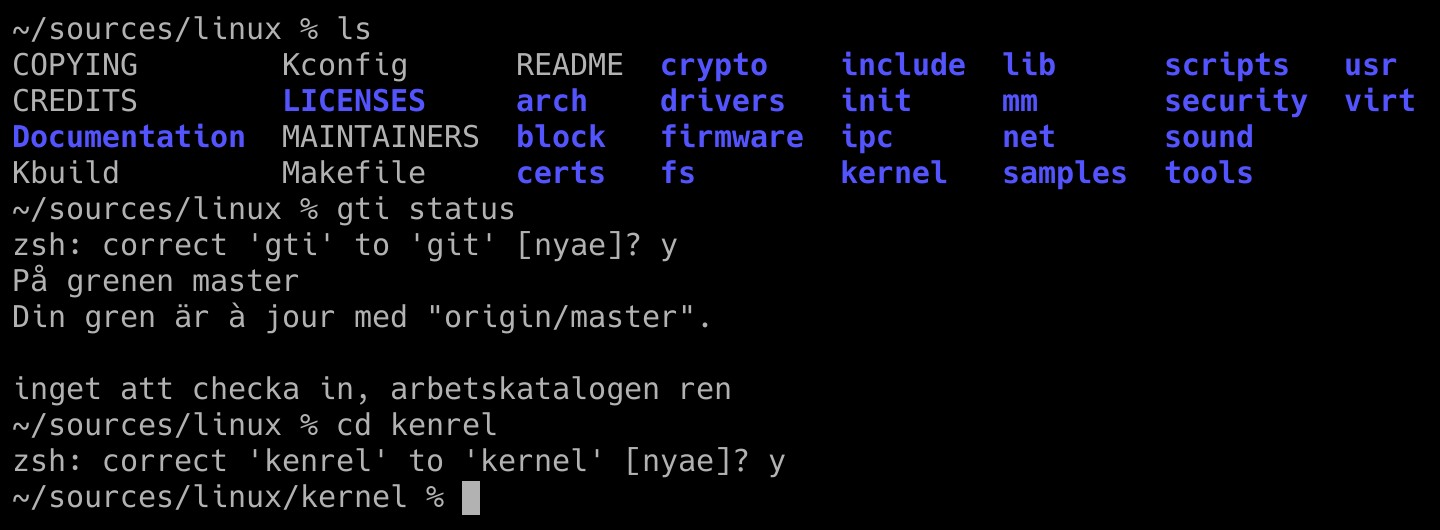
Any command line user has experienced countless times the mixed feeling of surprise and frustration when a command fails because of a typo. Or because of a forgotten sudo before some administrative command requiring root privileges. Some shells are able to detect certain categories of mistakes and suggest a possible correction, for instance Zsh can correct typos in commands and arguments for some commands, after enabling the relative options:
setopt correct    # Enable built-in command auto-correction
setopt correctall # Enable argument auto-correction
At this point, the interaction will look like this:
Auto-correction can be however rather inaccurate when enabling setopt
correctall, and sometimes it may wrongly suggest to replace an actually
correct argument with a file name that looks similar. Moreover, this mechanism
can only catch a limited amount of mistakes, for instance it cannot help in
presence of a misspelled git command. Luckily, git offers its own
auto-correction mechanism, that can be enabled in .gitconfig by assigning to
autocorrect a value in tenths of seconds, representing a wait time before
actual auto-correction happens.
[help]
	autocorrect = 20
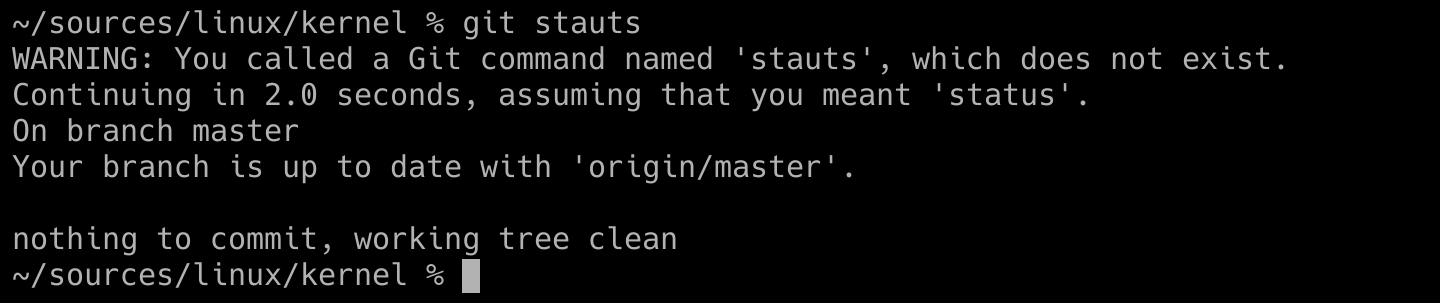
Now the result of a misspelled git command will look like:
Unfortunately, not all programs offer an auto-correction mechanism as git does. But nowadays the frustration is over thanks to Thefuck, a utility whose colourful name well summarises the typical reaction of a shell user in front of a command failing because of a typo. It relies on a rule-based correction mechanism, and custom rules can be easily added, or existing rules can be excluded.
The application can be installed by evaluating in the shell the output of
thefuck --alias, that defines an alias which will perform all the required
magic under the hood. Since the default value for the alias name is a type of
word that one may not always
want to leave around in the history of their machines, it is possible to set a
custom alias name, for instance fixit:
eval "$(thefuck --alias fixit)"
Now it is possible to autocorrect a failed command by simply typing fixit.
The application will show a prompt allowing to accept the suggested fix, scroll
through alternative suggestions, or abort:

No need to say that this utility needs to be used with caution and
never blindly, since in less trivial cases the correction may not be the one
expected and putting together sudo and random commands is a perfect recipe
for disaster.
Zsh
While bash is the ubiquitous shell and the most sensible option for portable scripting, modern alternative shells exists, such as fish or Zsh, offering handy built-ins and a large ecosystem of plugins that make them suitable to replace bash for interactive use. Personally I opt for Zsh because of its richness of features and large plugin ecosystem, but the choice of a shell is also a matter of taste and many great alternatives exist, for which similar considerations hold.
Zsh can be set as the login shell by using the chsh (change shell) Unix tool, which is most likely present in your system. What follows is not intended as a tutorial nor an introduction to Zsh, which could easily take not just a blog post but rather a book on its own. It is instead a display of some useful features and extensions available, and for the curious reader further details are available in the respective documentations and tutorials.
Configuration
Similarly to bash, Zsh sources a series of files at startup, that can be used
to control the environment and settings. Each file can be present in system
space (inside /etc) and user space (a dot-file inside $ZDOTDIR, which is
~/ by default), and system files are always sourced before user files. The
first file to be sourced is zshenv, followed by zprofile (only for login
shells), zshrc (only for interactive shells), and zlogin (only for login
shells).
In a post about Zsh it is impossible to avoid mentioning Oh My
Zsh, a popular framework for Zsh
configuration and plugin management. However, handling the configuration
manually is also very easy, and many Zsh plugins may be already shipped as
packages with your Linux distribution. What follows is an example .zshrc file
containing some useful basic settings.
# A large and neat history is valuable when using some tools
export HISTFILE=~/.zsh_history
export HISTSIZE=10000
export SAVEHIST=${HISTSIZE}
setopt inc_append_history   # Write immediately to history file
setopt share_history        # Share history among sessions
setopt hist_reduce_blanks   # Trim whitespace
setopt hist_ignore_all_dups # Ignore duplicates
setopt hist_ignore_space    # Ignore entries starting with space

bindkey -v # Enable vi-mode (use only if familiar with vi)

# Some useful keybindings
bindkey "^[[3~" delete-char
bindkey "^[[H" beginning-of-line
bindkey "^[[F" end-of-line
bindkey "^[[A" up-line-or-history
bindkey "^[[B" down-line-or-history
bindkey '^[[1;5C' emacs-forward-word
bindkey '^[[1;5D' emacs-backward-word
bindkey '^w' backward-kill-word
bindkey '^r' history-incremental-search-backward
Custom prompt
While the default shell prompt has a simple and reassuring look that remained
mostly unchanged through decades, some customisations can make it much more
informative, speeding up the workflow. Of course, Zsh allows to specify a
prompt template to be expanded, through the
PROMPT variable. Many
themes from the community are available, and an example gallery with themes to
please all tastes can be found in the oh-my-zsh
wiki.
A theme I personally like is Spaceship, which packs many useful features in a minimalistic, elegant, and unobtrusive look. Features include automatic hostname and username display, highlight of exit status, execution time, status indicator for git, mercurial, virtual environments, and many more.
Installation is as simple as sourcing a script in .zshrc, and a
large number of
options
can be changed by setting proper environment variables:
# The exact location may vary on your installation
. /usr/lib/spaceship-prompt/spaceship.zsh

# Customise some options
SPACESHIP_CHAR_SYMBOL='%% '
SPACESHIP_USER_SHOW=always
Completion
It is well known that the shell offers command completion via the
Tab key. Through custom completion functions, any program can
instruct the shell on how to complete its arguments. Zsh supports both its own
completion function syntax and bash completion functions, and many completion
scripts are available.
The completion system for Zsh can be initialised through a guided wizard by
calling autoload -Uz compinstall && compinstall, which will write relevant
code to ~/.zshrc, or manually by inserting relevant commands in the
~/.zshrc, similarly to the following:
# Initialise the completion system
autoload -U +X compinit && compinit
autoload -U +X bashcompinit && bashcompinit

# Show completion menu if at least two options are available
zstyle ':completion:*' menu select=2
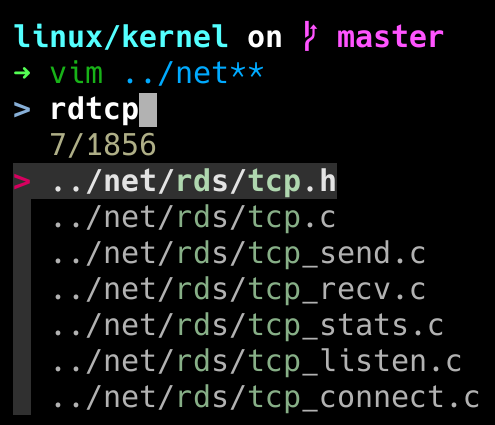
Last but not least, fzf offers a context-aware fuzzy completion
mechanism
for command arguments, that can be used by inserting a trigger sequence (by
default a double asterisk, **) followed by a Tab pressure. For
instance, to fuzzy-search a file from a given directory, to be passed as a
positional argument to vim:
Autosuggestions
While command completion is a great feature, command prediction can be an even better feature. A solution in this sense is offered by zsh-autosuggestions, which proposes a completion for the commands as you type, based on the shell history.
Autosuggestions are showed as greyed text, and can be accepted entirely by
pressing End or →, or one word at a time by pressing a
key combination bound to forward-word (ctrl +
→ if using the example configuration from above).

Also in this case, installation is as simple as sourcing a script in .zshrc
and, optionally, choosing a shortcut to accept the suggestions or configuring
other
settings:
# The exact location may vary on your installation
. /usr/share/zsh/plugins/zsh-autosuggestions/zsh-autosuggestions.zsh
bindkey '^ ' autosuggest-accept
Autojump
When moving around in the filesystem from the command line, having to type exact paths can be rather annoying, and even autocompletion helps only up to a certain extent. But also in this case, predicting can be faster than completing thanks to autojump, a tool that keeps track of visited directories, and allows to jump to a destination by specifying a part of the name (opting, in case of ambiguity, for the most visited among the matching alternatives).
Autojump is implemented in Python, and its functionalities are conveniently exposed through a set of wrapping shell functions, available after sourcing its install script:
# The exact location may vary on your installation
. /etc/profile.d/autojump.zsh
The syntax is unsurprisingly concise, given that saving keystrokes is the exact
purpose of the tool. A function named j allows to jump to a directory, and
its sisters jc and jo allow to jump to a child directory and to open a
directory in the file manager respectively.

Syntax highlighting
Syntax highlighting is an essential helper when programming, so why should the terminal shell be an exception? The zsh-syntax-highlighting plugin adds colour to the command line. Besides usual syntax highlighting features, such as literal and variable highlight, it provides a very useful visual feedback by highlighting valid commands in green, and invalid ones in red, and it underlines valid file names and patterns.
To enable syntax highlighting, it is enough to source its installation script.
This should be done at the end of the .zshrc file, otherwise widgets defined
after it will not update the syntax highlighting.
# The exact location may vary on your installation
. /usr/share/zsh/plugins/zsh-syntax-highlighting/zsh-syntax-highlighting.zsh
Alias tips
Aliasing is a well-known shell feature that allows to define shorter or easier to memorise shortcuts for commands, and it can be a valid ally to save keystrokes in the everyday routine. When making abundant use of aliasing, it may happen to quickly forget the less used ones, or it may take some time to memorise the new ones. The alias-tips plugin overcomes this annoyance by showing a friendly reminder every time a full-length shell or git command is used while there is an alias defined for it.
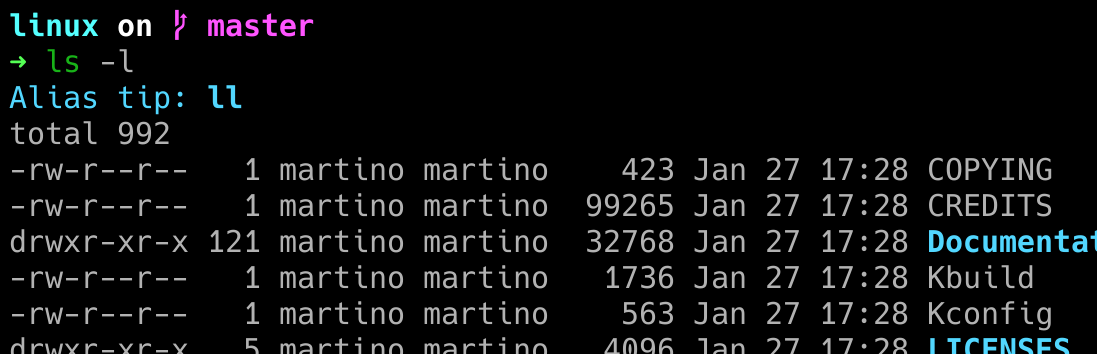
Also in this case, installation is a matter of sourcing the script from
.zshrc:
# The exact location may vary on your installation
. /usr/share/zsh/plugins/alias-tips/alias-tips.plugin.zsh